How to Install Stick on Tiles
Please watch the video and read the article. The article below includes some information not found in the video!
Tools Needed to Install Stick on Tiles
- Degreaser: this is very important. If there is any oil or grease on the area you are trying to apply the tiles, it won't stick.
- Cloth: to use with the degreaser.
- Ruler: used to measure out and cut the tiles in a straight line.
- Scissors or utility knife: you can use either but a utility knife will be easier if you have tricky cuts to make (like for an electrical socket).
- Pencil, marker or chalk: you may need to make guidelines on the wall for the tiles. If so, be sure you have a way to mark them.
Warning: Surface Types
You cannot install stick on tiles on any dusty, porous, bumpy or oily surface. They will either not stick or won't look good if you put them on the wrong surface. Read this article to see which surfaces you can apply stick on tiles to.
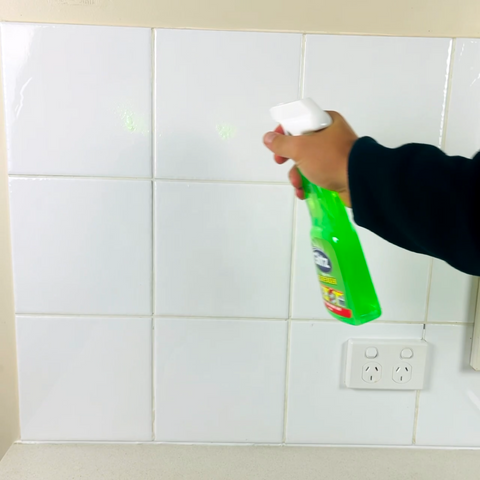
Step 1: Clean the Surface
This is a critical step and cannot be overlooked. Like we said above, if there is any dust or grease on the wall the tiles won't stick.
Buy a degreaser and give the wall a very good cleaning. Get every corner and be sure to clean down the bottom of the area as well. Usually the bottom of a splashback is the greasiest part and we see people forget to clean that area. It means the tiles won't stick to the bottom and you won't be happy with their appearance.
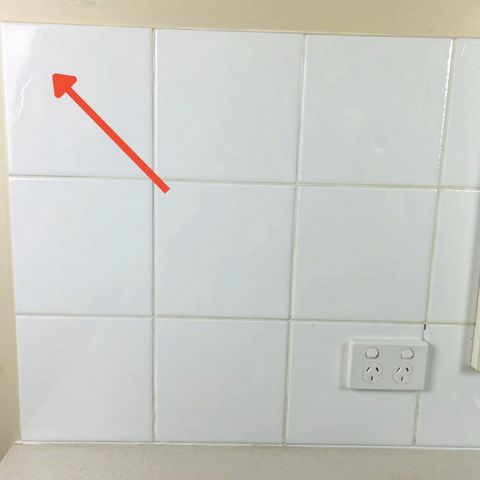
Step 2: Plan!!
Before you lay any tiles make sure you have a plan of attack. Place some tiles over the area without sticking them on and visualise what you are going to do.
Tiles should be laid from left to right. So start on the left side first.
They should also usually be laid from top to bottom. So you should most likely start at the top left corner first.
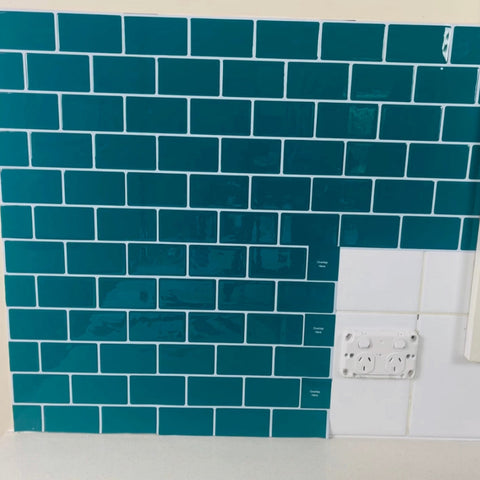
Pay attention to where your tiles say "overlap here".
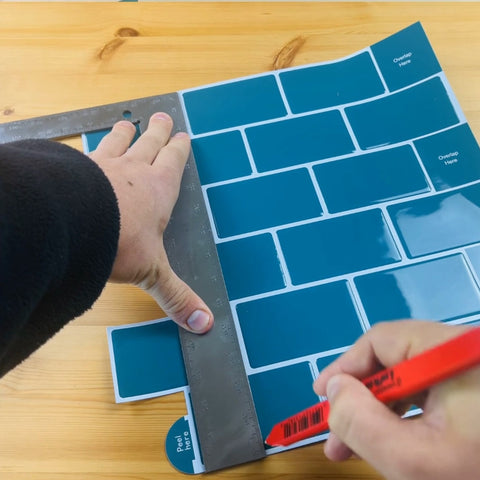
Step 3: Cut First Tile
Now that you have a plan of attack it's time to measure and cut your first tile. Unless the tile is a perfect square, you will most likely need to make a cut for the first tile in a row to make sure it's flush.
For the first tile of every row, be sure to keep the remaining cut-off tile. You may be able to use this piece to finish the row of tiles. Don't be hasty and throw it in the bin.
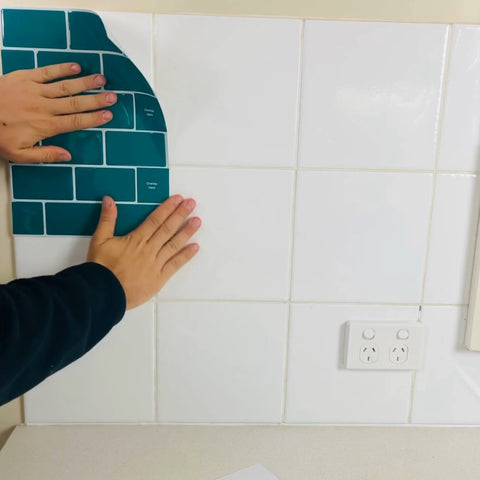
Step 4: Lay First Tile
There is a bit of a learning curve when applying stick on tiles, so pay close attention when sticking on your first one.
We recommend peeling off about 5cm of the backing and sticking on that small part first, making sure it's where you want it.
Then slowly start peeling off the rest of the backing and push out any air bubbles as you go. Air bubbles will cause your tiles to look deformed, so make sure you push them all out.
Step 5: Stick on Remaining Tiles
Now that you have the hang of it, start applying the rest of the tiles. Overlap tiles wherever it says "overlap here".
You will most likely have to make cuts at the end of the area. You will also have to make cuts for any electrical sockets, faucets, or anything else that's on the wall. If you have to make these cuts, using a utility knife is easier than using scissors.

Done!
Hopefully everything went well and you are happy with your stick on tiles. If you have any questions during your installation please contact us. Do not rush the installation if you aren't sure about something. We're here to help!